Quick Overview...Via your WebMate Control, Click on the Image icon to the right of the image that you want to change and change the title to your preference.Detailed instructions... |
||
| Step: #1 Locate the 'Gallery' folder within WebMate Control |
||
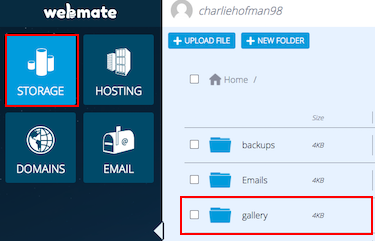
 First of all, log into WebMate Control and locate your Gallery folder within the Storage section. First of all, log into WebMate Control and locate your Gallery folder within the Storage section. Proceed by entering the folder and find the image you wish to change settings on. |
||
| Step: #2 Select the settings icon |
||
 Now click the middle icon to the right of the image that you want to change. Now click the middle icon to the right of the image that you want to change. |
||
| Step: #3 Changing the title |
||
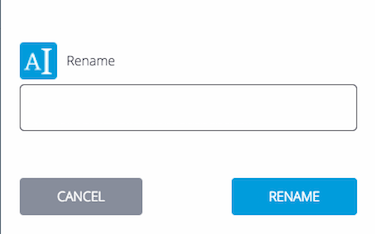
 From here you can make changes to the image's title. Enter the title you'd like to give the image and press Rename. From here you can make changes to the image's title. Enter the title you'd like to give the image and press Rename.That's it! You've now changed the title of your image in the Gallery. |
||
- 18 Users Found This Useful

