Configuring Apple Mail (OSX 10.6 - OSX 10.9)

Quick Overview...
To setup your WebMate mail account in Apple Mail, add the account using the details supplied in your email - filling the onscreen prompts. Remember to included the SMTP outgoing server settings and your full email address.

Detailed Instructions...

Step 1: Select Account
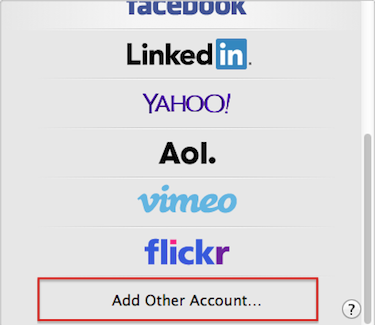
Go to 'Mail' (top left of your screen) then select 'Accounts'

Click the small '+' button on the bottom left of the accounts window.

Choose Add Other Account.
Step 2: Add Email Information
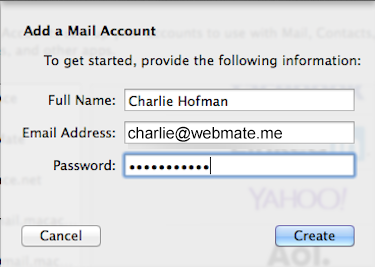
The first screen simply asks for your Full Name, the Email Address and your Email Password for that account. Fill these in and click Create.

Mail will then search for mail servers briefly before redirecting you to the Incoming Mail Server settings.

Apple Mail may say Account must be manually configured if it does, click Next.


info icon The details entered into the  ’Full name’ box will be used as the from details in any emails sent from this account in Apple Mail.
Step 3: Incoming Server Information
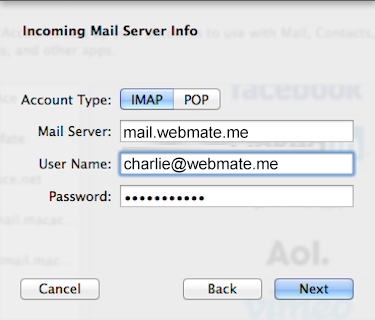
First choose your Account Type POP or IMAP.

info icon POP or IMAP ?
  We recommend using Account Type IMAP as this will sync across all of your devices, you'll be able to add this email account to as many devices as you like.
  If you know that you will only accessing this email account through this one computer you can choose POP.


The settings should be as below.
 
Mail Server mail.webmate.me
User Name Your Full Email address
Password Your Email Password
Once all details have been carefully entered, click Next.
 
Step 4: Outgoing server information
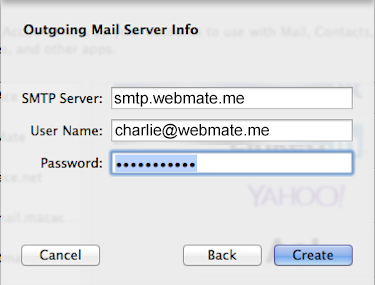
On this screen you will be presented with the following options, simply enter them as shown below.

SMTP Server smtp.webmate.me
User name Your Full Email Address
Password Your Email Password


info icon Apple Mail may say that the username and password are optional, They are not optional!
The Username (full email address) & password must be filled in for the account to be able to send mail.


When you're done click Create.

Wait a moment for the account to be created then you'll be able to send and receive using your WebMate hosted email account.

 
  • 108 Users Found This Useful
Was this answer helpful?

Related Articles

Importing your contacts into WebMail

To import your contacts onto WebMail just export your contacts onto your desktop...

Restore the preview panel in Apple Mail

In Apple Mail, if the email preview panel is missing – how to do I get it...

Migrating from POP to IMAP - Apple Mail

Quick Overview...Deactivate your POP account and drag the emails from your POP...

Scanning for Malware with Avast! For Mac

Quick OverviewClick here to install AVAST. Once it is installed onto your Mac open...

How to enable SSL in Apple Mail (OSX 10.10 - 10.11)

Quick Overview...To enable SSL on your email account in Apple Mail, go to...