|
||||||||||||||||||||
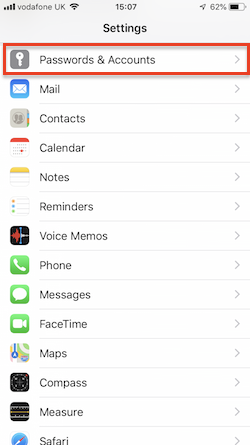
| Step 1: Mail |
||||||||||||||||||||
|
Go to your Settings on your iPhone |
 |
|||||||||||||||||||
| Step 2: Add Account |
||||||||||||||||||||
| Go to Accounts then click Add Account | 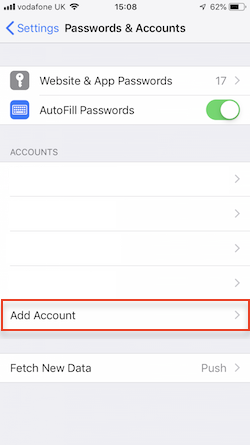 |
|||||||||||||||||||
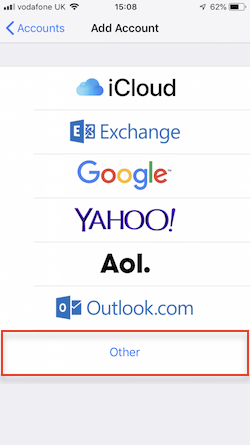
| Step 3: Other |
||||||||||||||||||||
| You will be offered a list of account types. Choose Other |
 |
|||||||||||||||||||
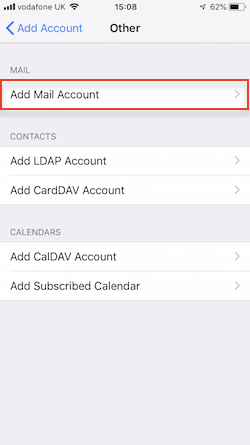
| Step 4: Add Mail Account |
||||||||||||||||||||
| Click Add Mail Account |
 |
|||||||||||||||||||
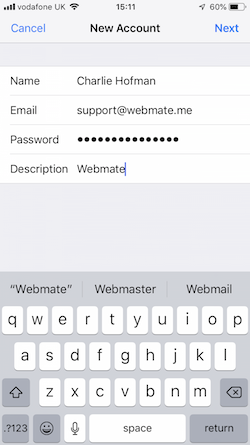
| Step 5: Account Details |
||||||||||||||||||||
Add your new email account details.
|
 |
|||||||||||||||||||
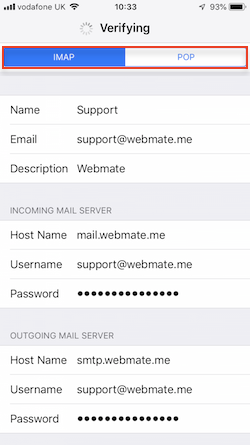
| Step 6: Account Type and Server Settings |
||||||||||||||||||||
Once you have entered the above details, click onto Next and your settings will verify. |
 |
|||||||||||||||||||
| Step 7: Save |
||||||||||||||||||||
|
Once the account has been verified, click Save. That's it! You have now added your WebMate email address to your iPhone. |
 |
|||||||||||||||||||
- 132 utilizatori au considerat informația utilă
