|
||||||||||
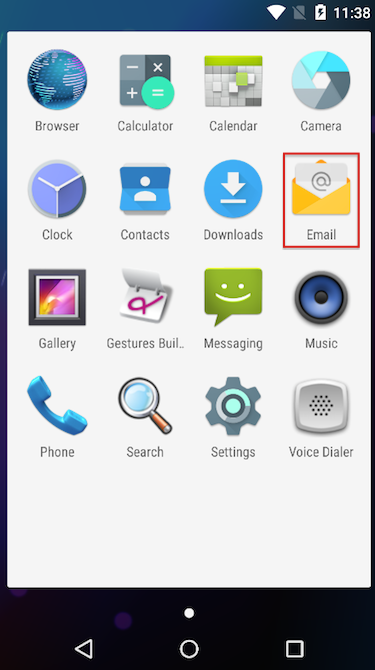
| Step 1: Open your email client |
||||||||||
| Open the Android email client within the Settings. |
 |
|||||||||
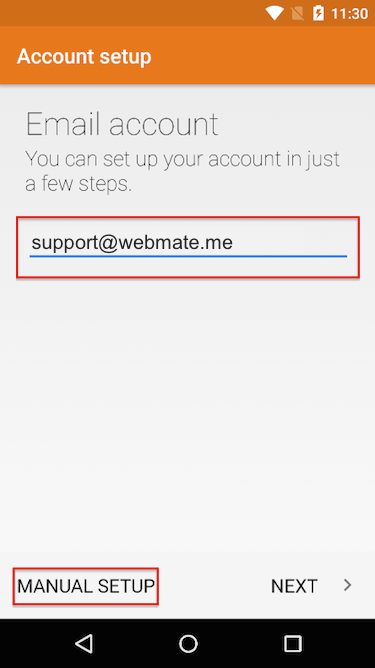
| Step 2: Add your email address |
||||||||||
| Add your email address and then select Manual Setup. |
 |
|||||||||
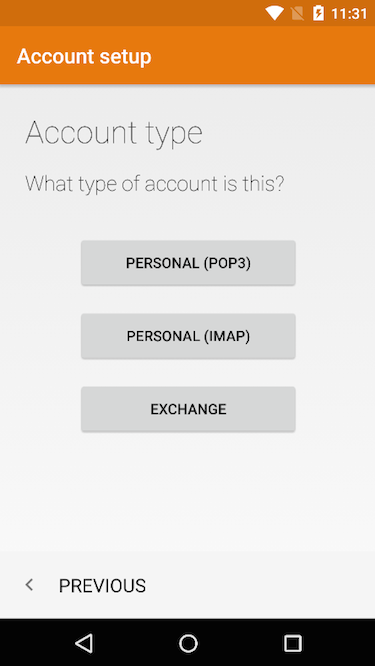
| Step 3: Select your account type |
||||||||||
Chooseyour Account Type POP or IMAP.
|
 |
|||||||||
| Step 4: Add the account password |
||||||||||
| Add your email account password to sign in. | 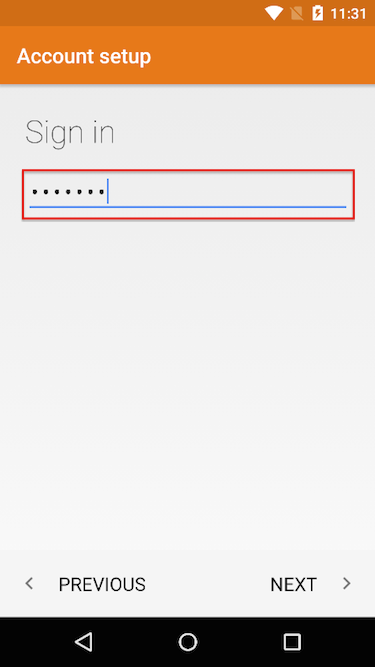 |
|||||||||
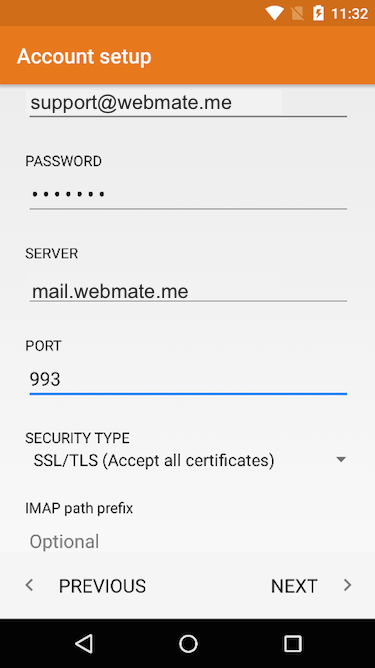
| Step 5: Enter the Incoming mail server settings |
||||||||||
| IMAP server: mail.webmate.me
Security type: SSL (Accept all certificates) IMAP path prefix: leave blank Click Next |
 |
|||||||||
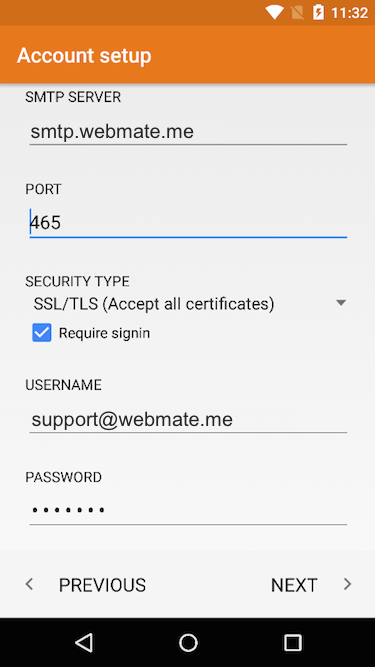
| Step 6: Enter the Outgoing mail server settings |
||||||||||
| SMTP server: smtp.webmate.me Security type: SSL (Accept all certificates) from the menu. Port: 465 Check the box Require sign-in Username: Full email address Password: Your email password |
 |
|||||||||
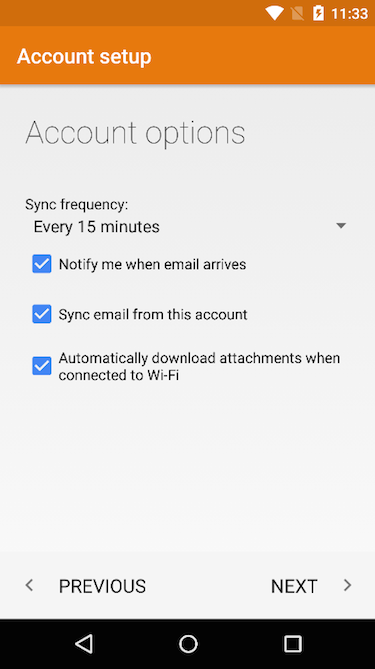
| Step 7: Set your account preferences |
||||||||||
Select the frequency at which you wish your mail client to check for new email.
|
 |
|||||||||
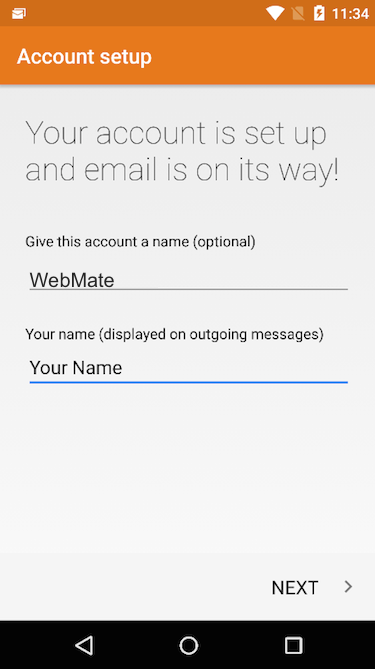
| Step 8: Identify your account |
||||||||||
| Give your account a name, this is handy if you have more than one email account. Enter your name as you want it to appear when sending an email. Click Done. |
 |
|||||||||
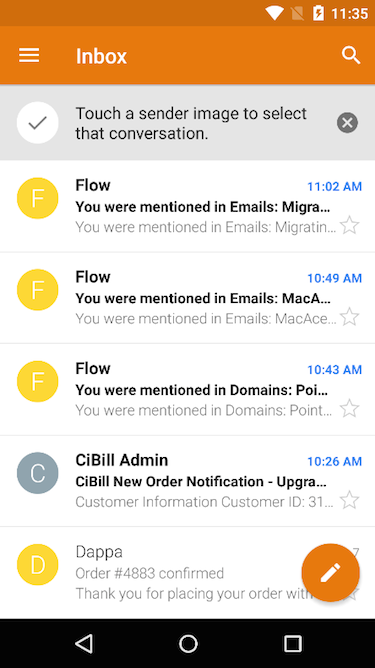
| Step 9: View your inbox |
||||||||||
|
That’s it ! You can now send and receive emails though your newly configured account. |
 |
|||||||||
- 49 A felhasználók hasznosnak találták ezt
