| Quick Overview...
If you want to add a blog to your WebBuilder Live site you can do it easily and with just a few clicks. Simply drag the blog module onto an existing page you've created and it'll be ready to start using. Blog entires added automatically add the date and commenting capabilities - but you can modify and adjust it's settings easily. Below is a step-by-step on how to create a simple blog. |
||||
| Step 1: Blog Module |
||||
|
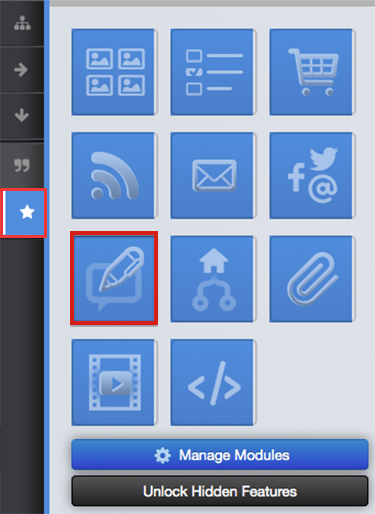
Once you have logged into WebBuilder Live as admin you'll be able to see a toolbar on the left of your screen, select modules and then blog modules from the toolbar.
|
 |
|||
| Step 2: New Post | ||||
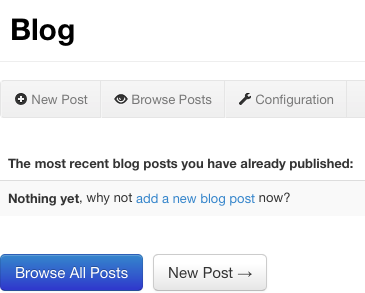
Once the blog module has been placed, hover over the empty blog module and click 'Edit'. You will then be presented with a page where you can browse or create a new post. Select 'New Post'.
|
 |
|||
| Step 3: Creating Your Post |
||||
| Here is where you can now start developing your blog fully. First you will need to enter a title for your blog entry, then you can start writing up your text. | 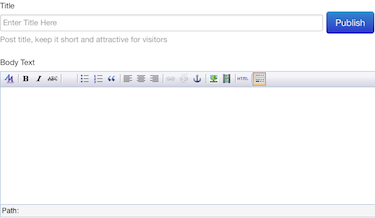 |
|||
| Step 4: Inserting Images |
||||
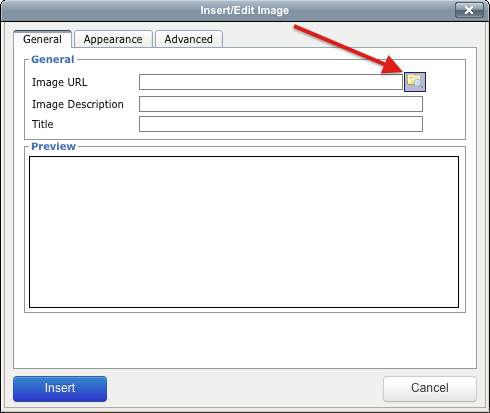
| First of all click the image of a tree in the toolbar that is ontop of the text box. Proceed by clicking the image of a file and then click 'upload new files'. Here is where you can select the image you wish to insert onto your blog entry. Once selected you will be shown a preview of your image and what it looks like with the text. If you're happy with everything click insert and it will then be placed with your text.
|
 |
|||
| Step 5: Padding |
||||
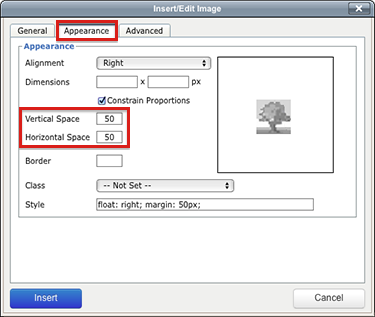
Padding is white space that can be added so no text is overlapping the images. To have space between your text and images insert an amount of space in the text boxes labeled 'Vertical' and 'Horizontal space' that can be found in the appearance tab.
|
 |
|||
| Step 6: Finishing off |
||||
| Once you're happy with everything click publish and you will then be took back to your main page with a new blog module waiting. The blog entry will have the date and time it was created with a comments button linking to where all of your feedback from other people will be. | 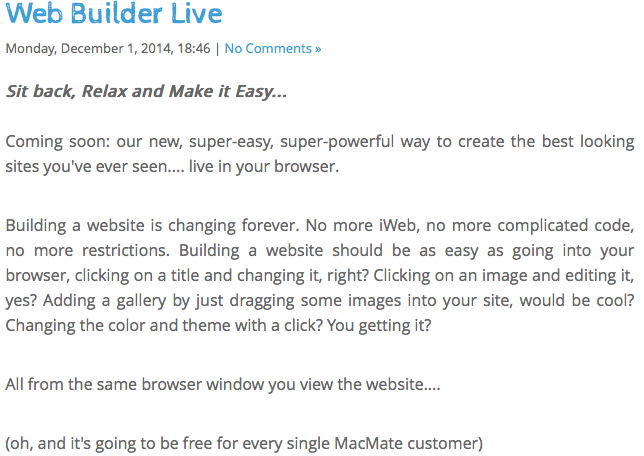 |
|||
- 111 کاربر این را مفید یافتند

