| Quick Overview... Go to Account Preferences in WebMate Control, Select Time Machine, click Enable then choose the amount of Disk space you would like to assign to the Time Machine back up. Click Save and your TM partition is ready to use. When you mount your WebMate, you'll see another disk (for example WebMate TM100) which you can choose and select in Time Machine on your Mac. Detailed Instructions... |
||||
| Step: #1 Enable Time Machine in WebMate |
||||
|
|
||||
| Step: #2 Connect to Server |
||||
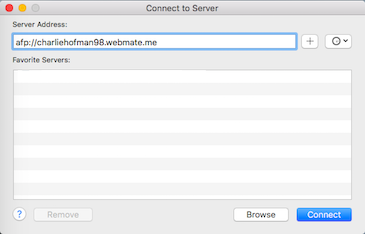 Use the “Command+K” method to connect to your WebMate Disk. Use the “Command+K” method to connect to your WebMate Disk.Hold down Command on the keyboard & press K to Connect To Server In the Server Address text box, type in your username followed by .webmate.me e.g. afp://yourusername.webmate.me Click Connect. |
||||
| Step: #3 Add user details to connect |
||||
| If you are already connected you can skip to step 4. In this window add your WebMate username and password. Click Connect. |
||||
| Step: #4 Launch WebMate's Time Machine Disk |
||||
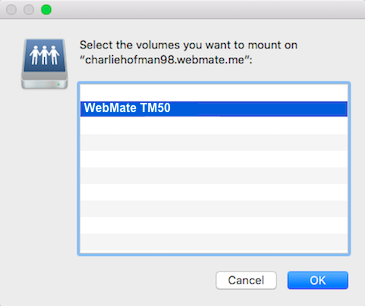 Choose the Time Machine volume you created in WebMate Control e.g. WebMate TM100. Choose the Time Machine volume you created in WebMate Control e.g. WebMate TM100. Click OK. This will mount the WebMate Time Machine Disk on to your desktop.
|
||||
| Step: #5 Setup Time Machine on your Mac |
||||
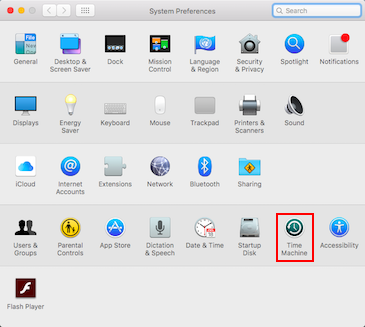 Click on the Apple on the top bar. Click on the Apple on the top bar. Choose System Preferences from the menu. Select Time Machine icon.
|
||||
| Step: #6 Time Machine: Options |
||||
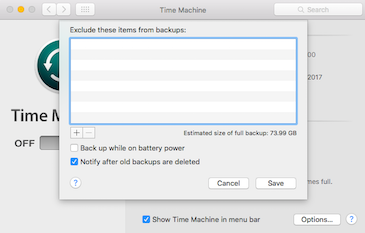 Click Options in the Time Machine control panel. Click Options in the Time Machine control panel. Here you can decide what not to include in the Time Machine backup, the more items you add to the Exclude list, the smaller the backup will be. To Exclude files from the Time Machine backup, click on to the plus symbol, this will open a window where you can select the files to exclude. To re-add an item to the Time Machine backup, select it in the Exclude list and click on to the minus symbol, this item will now be included in the backup.
|
||||
| Step: #7 Time Machine: Select Backup Disk |
||||
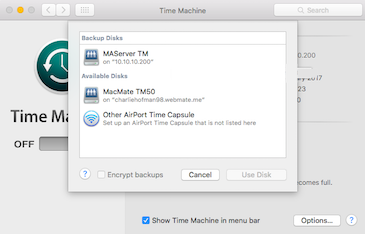 Click Select Backup Disk in the Time Machine control panel. Click Select Backup Disk in the Time Machine control panel. Select WebMate TM from the list. Click the Use Disk button.
|
||||
| Step: #8 Allow Time Machine to access WebMate |
||||
| Add your login details once more for Time Machine & click Connect. |
||||
| Step: #9 Time Machine setup complete |
||||
Time Machine is now turned on & it is using your WebMate Disk as a backup drive.
|
||||
 Login to WebMate Control. Go to Account Preferences (bottom of of the window).