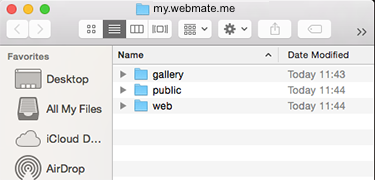
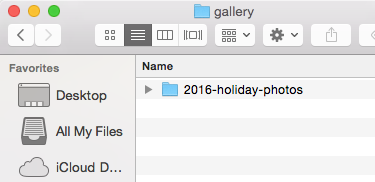
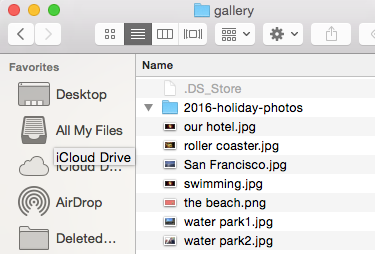
Quick Overview...Open your WebMate Disk, go to the Gallery folder, create a new folder within the Gallery folder (the folder name will be the gallery name) Open the new folder, drag and drop your images into the new folder.Detailed instructions... |
||
| Step: #1 Open your WebMate Disk |
||
 Open the WebMate Disk on your desktop by double-clicking on to it. Open the WebMate Disk on your desktop by double-clicking on to it. |
||
| Step: #2 Open the Gallery folder |
||
 Locate and open the Gallery folder. Locate and open the Gallery folder. |
||
| Step: #3 Create a New Gallery folder |
||
 Click on to the cog button and choose "New Folder" Click on to the cog button and choose "New Folder"You can then rename the new folder to something more meaningful like ... Example: 2016-holiday-photos. |
||
| Step: #3 Drag & Drop Images |
||
 Drag images from your computer & Drop them on to the new folder. Drag images from your computer & Drop them on to the new folder.This will upload the images to the WebMate server. The new gallery can then be viewed directly via the browser using your WebMate username followed by /gallery (include the forward slash "/") Example: http://my.webmate.me/gallery |
||
- 14 Корисниците го најдоа ова како корисно

