|
|
||
| Step 1: Open Mail and add a New Account |
||
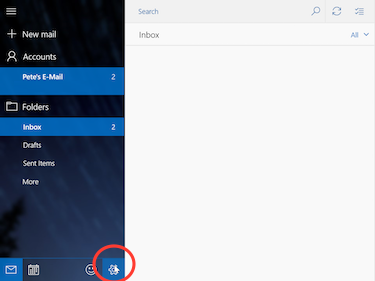
| Open the Mail Program by clicking or tapping on its tile on the start menu. Then click/tap the Gear Icon (bottom left) to get to the settings menu. Continue by selecting Manage Accounts |
 |
|
| Step 2: Add Account |
||
| Now click/tap on Add Account. | 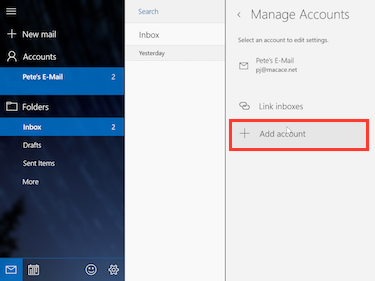 |
|
| Step 3: Choose an Account Type |
||
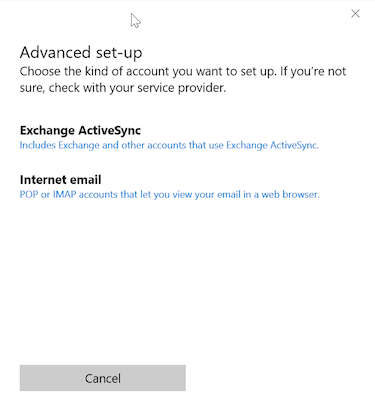
| On the Choose an Account menu click/tap on Advanced Setup, depending on your screen resolution you may need to scroll down before you can see it. Proceed by selecting Internet E-Mail from the Account Types. |
 |
|
| Step 4: Configure Your New Account |
||
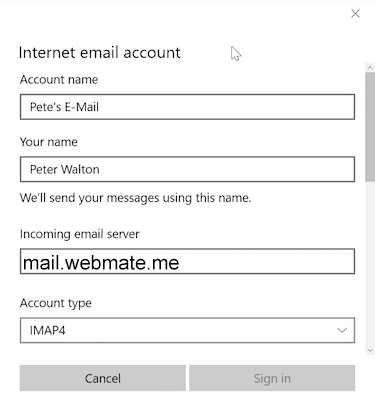
| Give the account a name and add your name in the appropriate box. Put mail.webmate.me as the incoming e-mail server and select IMAP4 as the Account type. Now scroll down to bring up the rest of the options. |
 |
|
| Step 5: Configure Your New Account |
||
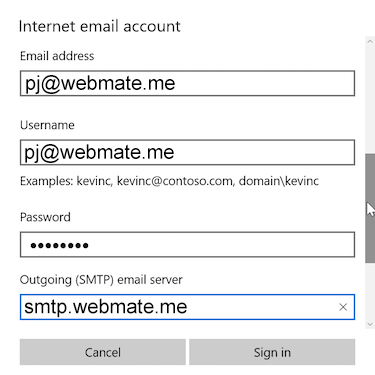
| Enter your full e-mail address in the Username box and the account password in the Password box. Enter smtp.webmate.me as the Outgoing (SMTP) server. |
 |
|
| Step 6: Configure Your New Account |
||
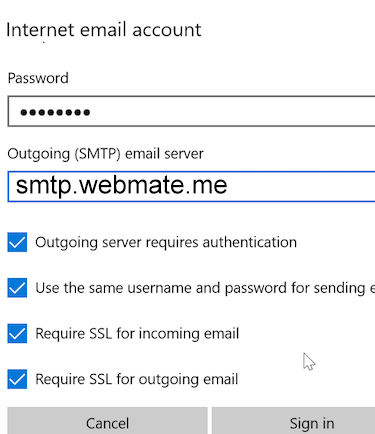
| Make sure the boxes in the image are ticked then click on Sign In. Then you're done ! |
 |
|
- 1 Els usuaris han Trobat Això Útil


Quick Overview...
Open Windows Mail and click on the Gear Icon on the bottom left and add your new Mail Account. Make sure the incoming and outgoing server information is correct.
Detailed Instructions...