| Quick Overview...
If you want to add a blog to your WebBuilder Live site you can do it easily and with just a few clicks. |
||
| Step 1: Select the gear symbol |
||
|
Once you have loaded your site select the Gear Symbol and click the Content button. |
 |
|
| Step 2: Apps |
||
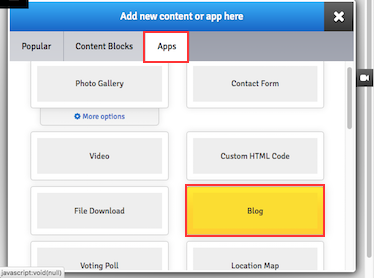
Now click on the Apps and this will show all of our Modules. Select the Blog module.
|
 |
|
| Step 3: Creating your first Blog |
||
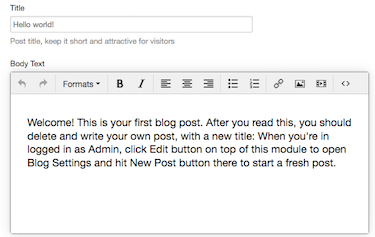
| Select Edit and here is where you can now start developing your blog fully. First, you will need to enter a title for your blog entry and then you can start writing up your post!. |
 |
|
| Step 4: Inserting Images |
||
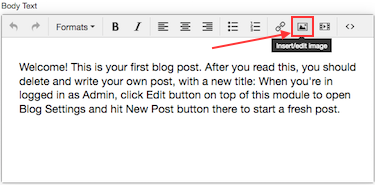
| To add an image select the 'insert image' icon and browse through your images that are on your computer. Select the image you wish to insert and they will appear within your post. |
 |
|
| Step 5: Padding |
||
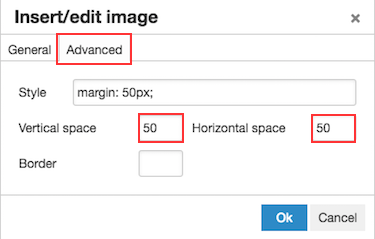
| To add padding to your images, go to Advanced. Add an amount of padding you would like around the images in the vertical and horizontal space (we use 50/50). |
 |
|
| Step 6: Finishing off |
||
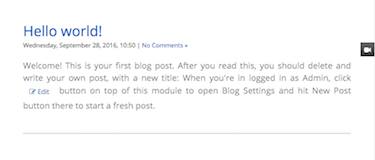
| Once you're happy with everything click Publish and you will then be taken back to your home page with a new blog module waiting. The blog entry will have the date and timestamp that it was created with and a comments button linking to all of your feedback from other people. That's it! - Your blog is now online! |
 |
|
- 1 Benutzer fanden dies hilfreich

