| Quick Overview... To create a gallery in WebBuilder, select 'Photo Gallery' from our modules page and start adding your own photos to the gallery. Detailed instructions... |
||
| Step 1: Load up your website |
||
| Load up your WebBuilder from the WebMate Control Panel or by typing in 'yourdomainname.com' |
 |
|
| Step 2: Go to Modules |
||
Once your site has loaded and you have logged in, click on the Gear Symbol and then click on Content. |
 |
|
| Step 3: Apps |
||
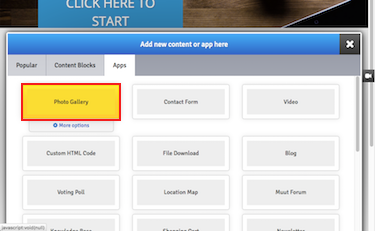
| Go to Apps and select the Photo Gallery module. This will then be placed onto your site. |
 |
|
| Step 4: Adding images |
||
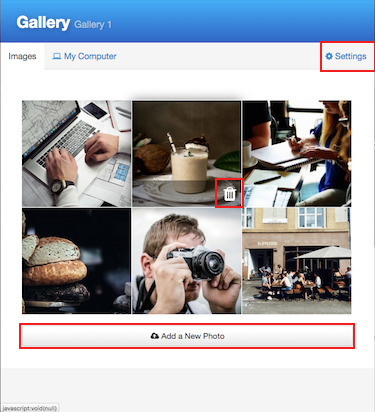
| To add images, hover above the galley, click the Gear Symbol and go to Edit this block. You will then be able to remove the temporary images and replace them with your own. To change your name of the gallery, go to the gallery Settings and you'll then be able to change the gallery name. That's it! You've now created your own gallery on your website!. |
 |
|
- 1 användare blev hjälpta av detta svar

