webmate Email Settings
|
|||||||||||||
| Step 1: Setup |
|||||||||||||
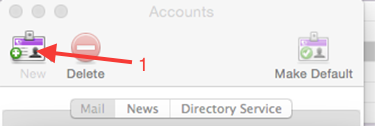
| Open Entourage, Go to Tools in the menu bar and choose Accounts. This will open the add account assistant. Click New to add a new email account. |
 |
||||||||||||
| Step 2: New Account |
|||||||||||||
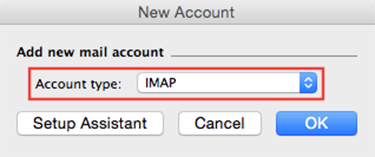
First choose your Account Type POP or IMAP.
When you're done click OK |
 |
||||||||||||
| Step 3: Edit Account |
|||||||||||||
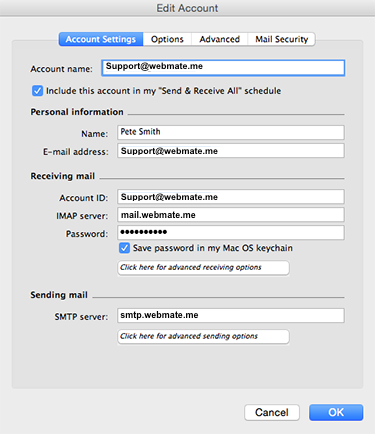
| For a basic email account setup you should only need to use the Account Settings tab. The Account name is just a description for this particular email account, using your actual email address could save any confusion later if more accounts are added. Personal Information: In this section you just need to add your Name and E-mail address. Receiving mail:
Sending mail:
|
 |
||||||||||||
| Step 4: Advanced receiving options |
|||||||||||||
| Advanced receiving options
To get to the Advanced IMAP settings, click on the button that says.
Click the square in the top left corner to close the window.
|
 |
||||||||||||
| Step 5: Advanced sending options |
|||||||||||||
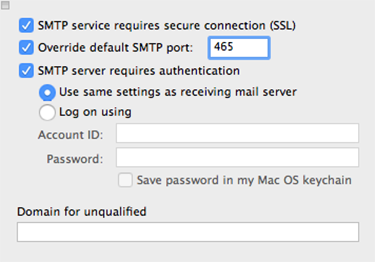
| Advanced sending options To get to the Advanced SMTP settings, click on the button that says.
Click the square in the top left corner to close the window. Once all details have been carefully entered, click OK. |
 |
||||||||||||


