| Quick Overview...
You can add sub contacts to your account via your WebMate Billing portal.
Detailed instructions...
|
|||||
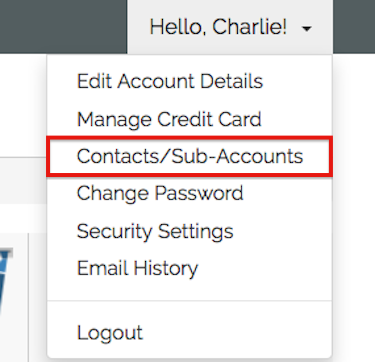
| Step 1: Add Contacts & Sub-Accounts |
|||||
| Click on your name top right of the billing area and choose Contacts/Sub-Accounts from the menu. |
 |
||||
| Step 2: Add the new user information |
|||||
| Add the new contact details to the form, Name, Address, Email Address etc. | 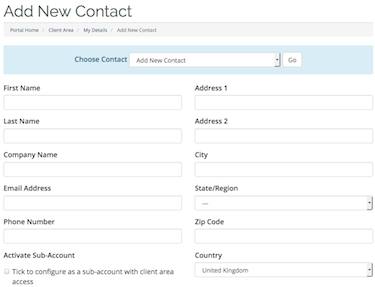 |
||||
| Step 3: Preferences |
|||||
| Check the boxes to determine what the new contact can access within the account. | 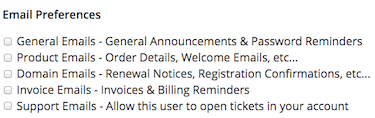 |
||||
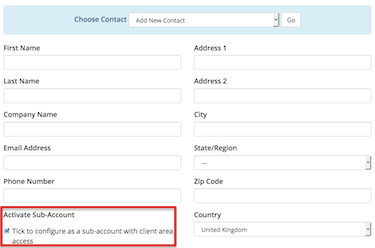
| Step 4: Activate Sub-Account (if required, see note below) |
|||||
| You should only activate sub-account if you want to give the contact further access and their own login. To activate the Sub-Account you will need to tick the Activate Sub-Account check box. |
 |
||||
|
|||||
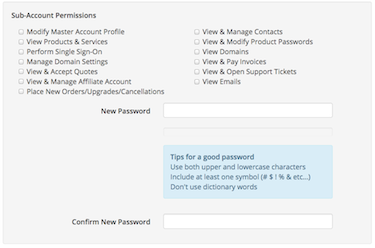
| Step 5: Permissions |
|||||
|
Once the account is activated you will see a Sub-Account permissions pop up. In here you can select what permissions they have on the account and also setup a password unique for the new contact to log in to billing. |
 |
||||
