Adding an Auto responder in Webmail

We’ve created setup guide to help you add a holiday auto-responder within webmail.

Login to WebMail and go to  Options  /  Preferences  /  Filtering  /  Holiday autoresponder,  add an accompanying message and enable the auto-responder.

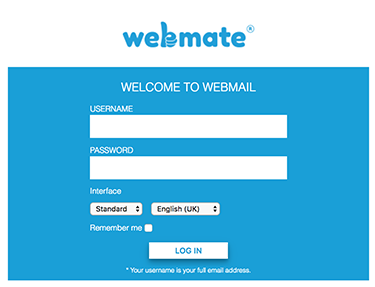
Step 1: Login to webmail
Login to WebMail with your full email address and the password for this email account.
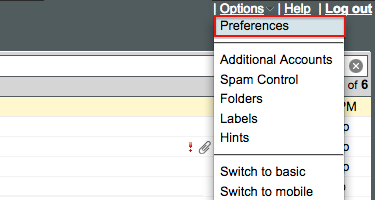
Step 2: Options
Go to the Options menu (top right) and choose Preferences
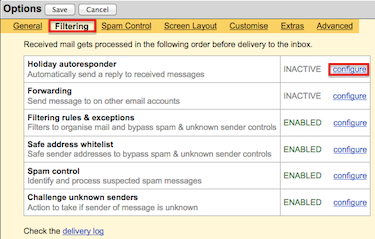
Step 3: Filtering
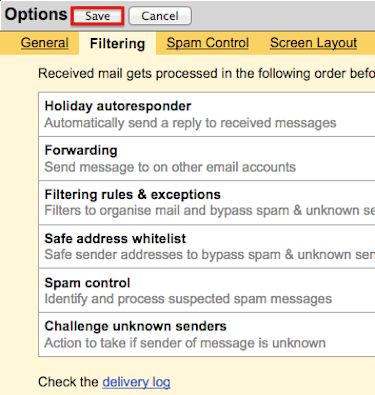
Click the Filtering link in the menu at the top of the page.

Proceed by clicking Configure on the same line as Holiday autoresponder.


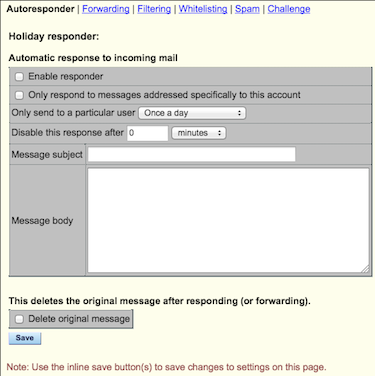
Step 4: Add Responder Message
Check the box to Enable autoresponder

Only respond to messages addressed specifically to this account.
If you select this option, webmail will only send a responder message to this email account, it will not respond to emails sent to any email aliases that have been created for this account.

Only send to a particular user...
Click the drop down menu to choose how often a responder message is sent to the sender.

Disable this response after...
You can choose how long the responder is enabled.
Alternatively you can just login and disable the responder any time you like.

Message subject.
Add a responder subject - just like in an email.

Message body.
Here you can add the main message that would be send in the email response.

Delete original message.
This gives you the option to delete the original message after responding.

When you're done click Save.

The responder will continue to work until it is disabled manually or until the Disable this response after X setting is met.
Step 5: Save Changes
After clicking Save in the step above you will need to click Save again on the Options page.

This completes the Auto-responder setup.
  • 49 brukere syntes dette svaret var til hjelp
Var dette svaret til hjelp?

Relaterte artikler

Importing your contacts into WebMail

To import your contacts onto WebMail just export your contacts onto your desktop...

Restore the preview panel in Apple Mail

In Apple Mail, if the email preview panel is missing – how to do I get it...

Migrating from POP to IMAP - Apple Mail

Quick Overview...Deactivate your POP account and drag the emails from your POP...

Scanning for Malware with Avast! For Mac

Quick OverviewClick here to install AVAST. Once it is installed onto your Mac open...

How to enable SSL in Apple Mail (OSX 10.10 - 10.11)

Quick Overview...To enable SSL on your email account in Apple Mail, go to...