Quick Overview...
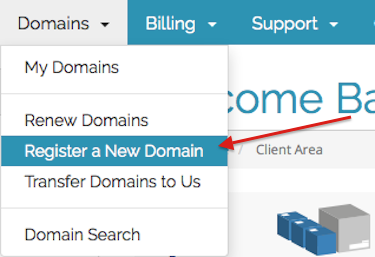
Log in to WebMate Billing https://billing.webmate.me with your registered email address & password. Go to Domains in the menu and select Register a New Domain. Detailed instructions... |
||||
| Step: #1 Login to WebMate Billing |
||||
|
Once you have logged in, click the Domains link in the menu and choose to Register a New Domain.
|
||||
| Step: #2 Check Availability |
||||
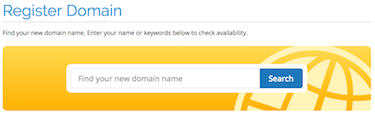 Type in the domain you wish to register, then choose the TLD (Top Level Domain) that you need by clicking on to the drop-down menu, .com, .co.uk, .net etc. Type in the domain you wish to register, then choose the TLD (Top Level Domain) that you need by clicking on to the drop-down menu, .com, .co.uk, .net etc. Then click Check Availability.
|
||||
| Step: #3 Domain Configuration |
||||
|
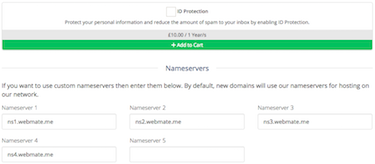
You also have the option to add ID Protection, this will hide your personal information fro websites such as who.is. When you’re done click Continue. |
||||
| Step: #4 Review & Checkout |
||||
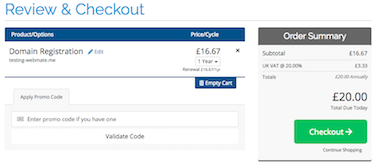 Take a moment to review your details. Please check the domain name for typos, as domain name registrations are non-refundable. Take a moment to review your details. Please check the domain name for typos, as domain name registrations are non-refundable. You have the opportunity to add different registrant details to the ones on your account. If you have a valid Promotional Code, you can enter this in the Promotional Code text box. You can also add Notes or Additional Information if required to add to your order. Finally, choose the Payment method that you would like to use, then click Complete Order. |
||||
- 24 Benutzer fanden dies hilfreich
